Sprite Ripping with Genecyst (by PrimeOp)
As you may have noticed, this website has a sprite section. Some would say that there's a fansite wrapped around that sprite section. Anyway, if you see a sprite from a non-SegaCD Genesis game, it was probably ripped with the Genecyst emulator. Bloodlust Software's DOS emulator arguably and rightly ruled the Genesis/Megadrive emulation scene for quite a while. While Gens and Kega are most people's favorites now, Genecyst is still my graphic ripping emulator of choice for one very big reason: true palette index screenshots.
Before you start: make a folder in your Genecyst directory folder and name it SSHOTS. Start up Genecyst, click File on the GUI (press esc if it doesn't appear on start-up) and select directories. In the box next to PCX:, add \SSHOTS after the pathname to your main Genecyst folder. This will keep that folder from becoming cluttered with PCX files.
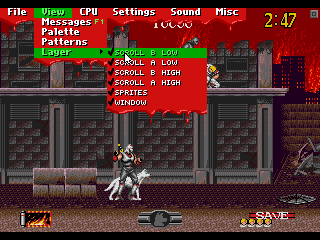 |
During gameplay, press P and the alt keys at the same time to pause the emulator (not the game). Press the ESC. to bring up the Graphic User Interface (GUI). Click View and go to the Layer option. Try turning layers on and off until you get the combination of graphics that you want. After disabling all unwanted layers, move the cursor over the top and bottom parts of the screen. If you see afterimages or echoes of the cursor, you'll need to turn some 'invisible' layer back on. Once you are satisfied that the graphics are the way that you want them, press ESC. again to make the GUI disappear. |
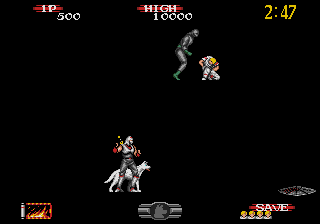 |
Now you can take snapshots by pressing the F9 key. If you want to advance one frame forward, press the alt and A keys at the same time. This is one of the easier ways to capture animations. Depending on the move, you can hold the controller directions and buttons down one step at a time while you advance a frame. For example, Streets of Rage 3 runs can be captured like this: pause, hold forward on the gamepad/keyboard and advance a frame, advance another frame while holding nothing, then repeat the earlier Forward + FRAME ADVANCE step, and advance until you see the run animation beginning. |
| If the graphics that you want do not use a 0/0/0 RGB black, you do not have to do much more. Many people find that it's easier to turn the background color into something very different from anything in the sprite like bright magenta (255/0/255) or bright green (0/255/0). You can use either find and flood-fill all the black areas or use the Color Replacing tool. But what happens when the sprite uses 0/0/0 black? In any emulator that either gives you full-color snapshots or merges all the colors together for a unified, optimized palette, there nothing you can do. But if you're using Genecyst and Nesticle, you can edit the palette and change the background to something else. This is one of the many reasons why I still use Nesticle and Genecyst :) Here's how I do it: | |
 |
Open your screenshots with a graphic editing program that can change a palette. I use PaintShopPro 7, so your program may use different steps and terms. With PSP7, click Colors/Edit Palette (shortcut: Shift+P). That will bring up the screenshot seen to the side of this text. Click on it to see it in full-size. If you place the cursor over the picture and click on an empty area, the Edit Palette window will draw a small box around the color that you just chose. Go back to that window and click on that box. |
 |
Once you click the color box, the Color window should appear. Now you can change it to something that looks nothing like any color in the graphics that you want. As I mentioned earlier, 255/0/255 seems to be a favorite of many. After changing the color, press OK and that will return you to the Edit Palette window. Press OK to return to the picture. |
 |
And this screen is proof that your 0/0/0 pixels are intact ^_^ From this point you can crop the graphics however you need to do it. |
|
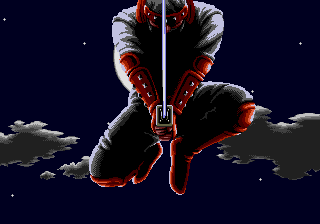
This trick is for those times that the screen starts to fade but the color order on the screenshots remains the same. Take a screenshot of the regular colors and save its palette. Open the screenshots where the fade started, load the palette from the true color version and make sure the 'maintain indexes' option is used. If done correctly, the colors will match the ones in the regular screenshot. In the case of this Shinobi III pic, I took multiple snapshots of Jo Musashi as he passed by the screen, applied the palette to each shot and pasted all the parts together. That's how I got the whole Shinobi III intro pic | 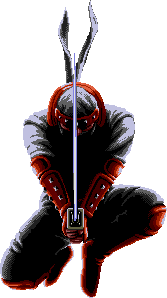 |
Thanks go to the following:
Sega (for making the Sega Genesis)
Bloodlust Software (for making the emulator)
Please remember to support the companies that make these great games by buying any well-done classic re-releases, collections, downloadable content and all that good stuff.
Return to top of the top of the page